Saturday

Double Exposure

The sunshine today was so inviting. I was in the backyard to photograph the next step of the envelope construction and changed gears for a little while to experiment further with cyanotypes. I was thinking about the different layers created in the monoprints from yesterday and wanted to make a similiar effect by creating multiple exposure cyanotypes. When making multiple exposures I really had to get in tune with the value change that happens during the exposure of the print, and move swiftly to move the objects to continue the exposure.
The layers that emerge of faint images enhance the depth of the print. It has a similar feeling to the ghost prints from monoprinting with the gelli plates. 
I am always awestruck with the botanicals. The man-made stencils are fine, but do not have the same ethereal aesthetic as the organic matter. I posted the short video above of the prints in the wash because it is so tranquil to watch the images emerge in the water and just float. 


Friday

Envelopes & Monoprinting


  I spent the day making monoprints that will ultimately become a set of envelopes. I made a template and drew out the pattern on several different  kinds of papers, different sizes as well.
As I worked, I realized I did not need to draw it out ahead of time, I can use my template as a pattern after the prints dry. I borrowed a few extra gelli plates from a friend to increase the scale I could print to make the envelopes larger while keeping consistency with the pattern and color palette you get with a single pull of a print. I put one of the predrawn papers underneath the plates as a guide, the transparency was perfect for that. I put the plates next to each other and lined the seems with the edges of the folds of the envelope.
I realized that the store bought gelli plates were not as generous with the ghost prints as the homemade plate. The ghost print is, in my opinion, the desired result. The larger surface area was challenging as well, I had to ink the plates faster.
I did continue to use the smaller plate as well. I want to make different size envelopes for comparison sake. I used the gear stencils as well as the stencils I made of the Capitol building and letters. I printed on two sides, but I am not sure if that is going to work out, lining that up was pretty tricky. I have plenty of prints for experimentation.


Tuesday

Stab stitch...

The stab stitch is new to me. Planning was going swimmingly. I am genuinely excited to make this stab stitch book. Paying attention to the details of the measurements and placement of the holes in for the binder. This is a challenge. I made a plan, reviewed all the documents and the video, cut all the necessary parts. Turns out that was the easy part.
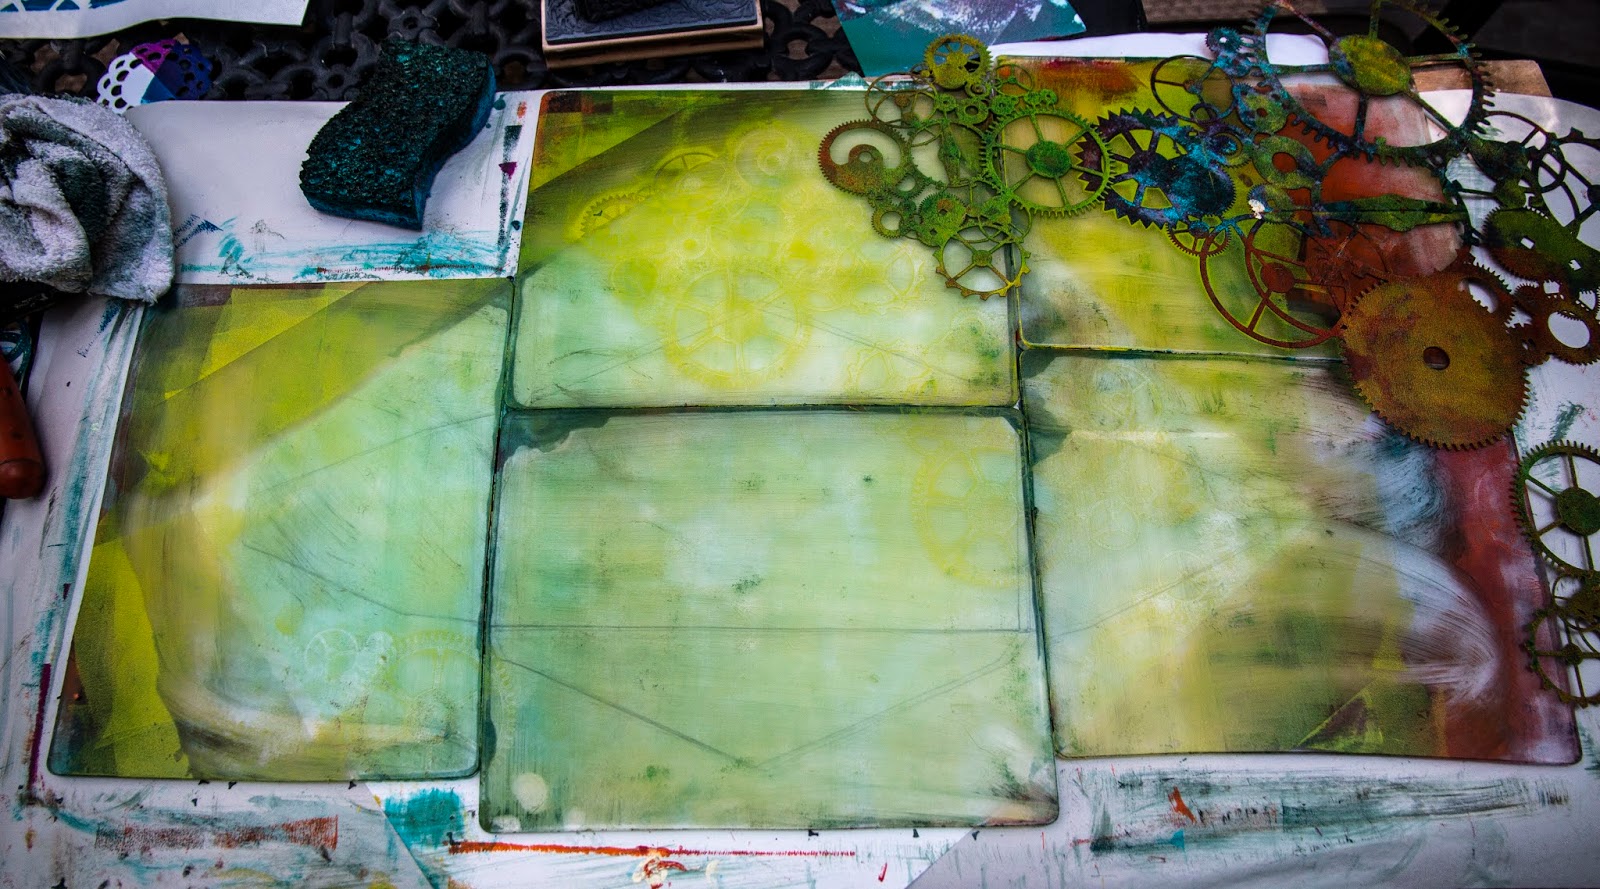
The covers are monoprints that I made with gear stencils on the gelli plate and they are embellished with priority mail stickers. 
Assembling the book was easy, making the holes was not. I used the awl, and then had to employ a little more power, so I used the drill to be sure the holes were large enough for the multiple stitches, or so I thought...
I used binder clips and eventually a heavy duty grip on the table to keep the pages, spacers and covers together and the holes lined up.  
 This is where it has ended for now. I proceeded to break all four sewing needles, clearly my stitching holes were not big enough for multiple passes and the pliers I thought would be helpful were the demise of my needles. I will get back to this as soon as I replace the needles.
TO BE CONTINUED...

Monday

Accordion Books

Exploring accordion books I was reminded that you should always measure twice before cutting or folding. 
I started with a practice book. Above is a 2 1/2" x 3 1/2" accordion book, using a monoprint for the cover and drawing paper for the accordion pages. It was a good trial run for a larger book. When constructing an accordion book and there is an abundance of folds, the bone folder is a critical tool.

For the second accordion book I wanted to make a pocket accordion book with a USPS theme. I used brown paper for the pocket pages, the same kind of brown paper used to wrap packages that would be mailed. The cover is paper, not fabric. Using monoprints and priority mail stickers I created a design for the book cover. The pockets will hold mail art, priority mail stickers and stamps.


 The most challenging part was measuring before folding and cutting... big take away, measure twice before making folds or cuts...I had a few do-overs in my haste.

Wednesday

Cicadas


Yesterday while I was making Cyanotype prints, I was looking for interesting organic shapes and I remembered I had some pristine dried out Cicadas. While they did not make the cut for the prints I yesterday, today they became the subject matter for my linoleum print block. 

The periodical Cicada emergence was rumored to be this summer, on top of the pandemic and the social unrest the possibility of being over run with cicadas seems par for the course. However, they have not yet revealed themselves.


Tuesday

Cyanotypes


Who needs a darkroom when you can harness the sun and make visually stunning imagery using the greenery in the yard. Once the paper is treated and dry, this is such a portable medium. It would be so easy to take along while traveling. 

 This was a perfect weather day spent experimenting with Cyanotypes. I printed digital negatives on transparencies, but really found that working with the ferns, dried out hydrangeas and grass was more appealing. I appreciated the opportunity to be outside all day away from technology. 
I may combine architectural digital negatives with layer of botanicals in the next iteration.